
A few years back I put together a life-sized Candy Land game for an Easter event. I am going to be honest, this was not an easy project, but once it was finished it was great. The kids loved it, the parents loved it, and we’ll have it for years to come. In this post, I’ll discuss how we did this and the alternatives we considered that could save you time and money.
Before starting this project you need to answer the following 7 questions (along with what I decided to do):
- What do you want to use for the colored spaces that the kids will walk on? (We used interlocking mats.)
- Will this be a one-time use or will you use this life-size Candy Land game for years? (We wanted to make it durable enough to last for many years.)
- What surface will the game be on; grass, concrete, dirt, indoors? (We placed our game on a basketball court.)
- How do you want to represent the characters; wood, paper, real-life? (We went with wood. Although, having real live people dressed up like the Candy Land characters would be really neat.)
- Do you want to use a die, cards or prize wheel for the game? (We went with a huge die first then switched the following year to a prize wheel.)
- How much are you willing to invest in this project? (Our version came in at about $900. You can do it for less and I’ll discuss how.)
- Are you willing to invest the time into this? (Overall I’d say we spent a total of 110 hours divided by 5 people, or 22 hours each.)
So you read over the questions, considered the commitment and decided to go ahead with it. Great! Let’s get started.
The Game Board

When we were trying to figure out how to set up the spaces of the game board we went through a number of ideas, we asked other organizations how they designed their Candy Land set-ups and we did some online research.
We wanted the game spaces to last a long time but they needed to be light because we knew we’d be carrying them to and from storage every year. We also needed to have them 6 or 7 different colors based on the game itself. Another consideration was the time it would take to create 70-120 spaces. We knew we would be cutting and painting characters and felt we didn’t want to spend the extra time cutting and painting spaces as well. Below were the options we considered:
Plywood Squares – These fit the durability test, but they needed to be cut, sanded, and painted. Plywood can also be very heavy.
Paper Squares – For a one-time use, indoors we might have considered this option. We needed long-lasting, so this was not the right fit for us. This is probably the least expensive route, however. Purchase card stock and it should last you one event, indoors.
Laminated Paper Squares – This would be more durable, but not good enough. It definitely wouldn’t have worked outside, and inside, the slickness of the lamination would make it slippery. We don’t want anybody falling.
Poster Board – I like the size of these and we would have been able to order them in the right colors, but they would not have been durable enough for years of use. However, due to the cost, especially if we would have recycled the poster board for future crafts, this is a good option. You would just need to buy new poster board each year.
6 Large Canvas Tarps (with the spaces painted on them) – This is one I seriously considered. Once it was painted we would just unroll it and play. It would have taken 6 canvas tarps (at least the ones I liked) to cover the basketball court. It would have taken a fair amount of paint, but the paint we had.
Poly Spots or Poly Base Markers – Here was our second choice. We found 12″ poly spot markers and 9″ square spots. Both would have worked very well. The 6 pack came in the 6 colors of the game as well. They are durable and there is no prep work (cutting, painting, etc.) needed.
 Interlocking Foam Tiles/Mats – We have used the poly spots and the foam mats in other programs so we knew they would both hold up to the abuse of a special event. The reason we went with the foam mats is because they interlock and they are bigger than the poly spots. We didn’t want the spots moving around. The mats also came in the six colors we needed. I purchased the 1/2″ 2’x2′ premium interlocking mats. They came quickly and in perfect condition at a price I couldn’t find anywhere else. I purchased 90 tiles. Over the long haul, I’m certain this will prove to be the most frugal option, especially if we use the mats for other programs.
Note: In Candy Land, there is a seventh color, pink, which are the spaces the “treats” are on. We decided that we didn’t need pink and placed pictures of the “treats” on one of the regular colors.


![]()
![]()
Next, I found the different treats that are in Candy Land like the gingerbread man, a candy cane, an ice cream cone, etc. I printed each one out and laminated them. At the event, I duct-taped them to one of the mats. I had the treats in the same order and general location as the board game.
The Game
Now that we have a board, it’s time to give you the rules of the game. It is very simple. I learned a few things I should have done after the first event and the rules below include them.
- The participant starts behind the “Starting Line”. No more than 2 children can go together. If you are using small squares you might want to limit it to one child.
- The facilitator rolls the die, takes a card or spins the wheel (whichever you decided on). Whichever color comes up the child will move to that color space.
- On the next roll of the die any child already on the game board, as well as the child at the “Starting Line” will move to the color that comes up. For example, if the facilitator rolls the die and it comes up blue, everyone moves to the next blue space from where they are standing. There will be multiple children on the game board at any given time.
 You’ll need one adult at each “treat” space. When a child passes a “treat” space they get a candy. If they happen to land on the “treat” space they get a premium candy. For example, the candy cane might be taped to a red space (if you’re not using the traditional pink spaces). If the die is rolled and red comes up, and the red space that happens to have the candy cane on it is the next space a player (child) goes to, the player receives a premium candy. You can give out small candy canes for the children who pass the “treat” spot and a normal-sized candy cane for those who land on the “treat” spot.
- We also gave each child an additional candy for completing the game.
Note: I tried to get candy that represented the “treats” in the game. I was unable to find candies that fit perfectly. I quickly found out that nobody cared what kind of candy they got. They were just excited to get something. However, they were thrilled to get a bigger candy for landing on the “treat” spaces. In our fourth year of doing this, we decided to have a prize booth. So, if the kids landed on a treat space they would get a ticket to be redeemed at the prize booth. you could do the same thing with a camp store.
Now, I realize we live during a time of childhood obesity and there is a push for nutritious snacks and food to be given to our children. I’m not about to give a child a carrot in a game called Candy Land. The community I worked in was very organic food-friendly. Having said that, I did not have even one parent complain about us giving a bunch of candy to their kids. I guess it’s because on special occasions like Easter and Halloween parents are more tolerant of sugary treats.
The Characters
It’s time to create the characters.
Candy Land has gone through a few versions so we had to figure out if we wanted to create the game using the new characters or classic characters. We went with the new ones.
We wanted to make the characters close to life-size and wanted them to be long-lasting. So we used plywood.

The Characters
- I bought quality plywood that didn’t need much sanding. It was a little more expensive but worth it.
 I used the character sheet above and connected the computer up to our projector. I then projected one of the characters onto a piece of plywood that I had propped against the wall. I moved the projector back until the character was projecting onto the wood the size I wanted.
- Once the character was projected onto the wood I traced the outline with a Sharpie. I did this with each character. Some of the characters, like King Candy, were too big to fit on the 4×8 piece of wood so I had to alter the outline a bit.
 Next, I used a jigsaw to cut the character out. This may be something you need to ask someone else to do (public works, maintenance man, volunteer facilities personnel, etc.).
- Then we sanded the edges to make them nice and smooth.
- After that, we used a white wood primer and painted both sides and all edges.
- It was now time to project the character on the cutout. Once the character was projected onto the cutout we traced the lines of the clothing, face, etc. so we would know where to paint.
- We have someone on staff that can paint very well and she went to work. Most people can do the basic painting after the character is traced out. That’s really all you’ll need to do. Our artist did some shading and mixing of colors to make it pop.
- We painted the backside with candy cane stripes. We considered making it look like the backs of the character, but we had already invested so much time into this that we figured we could do the simple stripes and go back later to paint the back sides of the characters if we wanted to. Personally, I like the stripes.
We created all of the characters in the image above except for the beaver and Lord Licorice. We also created signs that you see in the game. This we did freehand though, not with the projector.


The Bases
- Next, I created the bases. I purchased square pieces of wood and some 2x4s.
- I cut the 2x4s using a circular saw.
- We sanded where necessary and covered all the wood with a white primer.
- Then after doing some measuring, I attached 2 pieces of 2×4 to each base using 2″ screws from the bottom, wood glue and angle brackets. They were just far enough from each other to allow the character to slide in between them, holding the character upright. You can see the base of the characters in the photos above.
I was going to do a few other things to make sure the character didn’t blow over, but when I was done it seemed pretty stable. The day we ran the event there was a little wind but the characters never fell over. The bases lasted about three events then they started separating from the weight of the characters.
Base Alternatives
- You can prop the characters up against walls or fences.
- You can take 2×4 pieces and create legs for the back of the character, making a kind of tripod.
There are probably 10 other ways you can keep the characters standing, but since I’m not handy like that, I’ll leave it to your engineering skills.
Characters Alternatives
If the above seems too expensive and/or time-consuming you can…
- Paint the characters on butcher paper and hang them on walls.
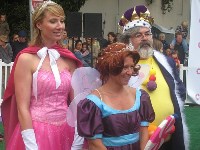
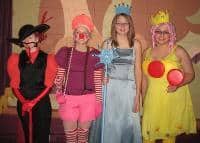
- Have people dress up as the characters like you see in the photos below.
- Make the characters out of Legos (okay that might be more expensive and time-consuming, but it would be cool).
Dice, Cards or Spinner
In the first version, I decided to use a die. I felt that rolling a huge die would be more fun to watch than having someone pull a card. We did not have a prize wheel at the time.
The Options:
CARDS
If you use cards, make them large. They should at least be the size of a sheet of paper. If I were going to do this I would print out each color onto stock paper so it wouldn’t show through the paper and then laminate each sheet. I would probably create three cards of each color so that the “deck of cards” is bigger.
Pros:
- It’s what they use in the game so using cards is more authentic.
- Cutting pieces of poster board and coloring one side, or laminating paper sheets with the colors on one side is fairly easy to do.
- The kids can pick their own card from a pile of cards.
- Easy to store
Cons:
- Not a whole lot of fun to watch for the other kids.
- If the cards get bent or damaged it’s easy for the kids to pick the color they want without seeing the face of the card.
- You’ll need to constantly shuffle or mix the cards.
COLORED BALLS
This is an idea one of my colleagues had where the kids reach into a bag or jar and pull out a colored ball. Using a container that cannot be seen in to, fasten black fabric across the top with a slit in it so that when kids reach into the container they cannot see what colored ball they are grabbing. For the balls, you can use colored golf balls, ping-pong balls, pit balls or sponge balls. I’m sure you can think of other ideas as well.
Pros:
- I think the kids would find it neat to reach into a container and pull out a colored ball.
- This would be pretty easy to put together.
- Easy to store.
- You won’t have to shuffle or throw anything.
Cons:
- When some kids reach into something to pull out an object they sometimes get a little rough. Make sure the container is sturdy and won’t break if dropped.
- It’s not as visual as the die or the cards.
DICE (DIE)
I used a 36″x 36″ cardboard box to create my die. It was very big, and that’s what I liked about it. I covered it in butcher paper and painted each side a different color. Once it was dry I used 3 rolls of contact paper (A sticky paper that is used for laminating without a laminator. It can be purchased at office supply stores.). By the end of the event, the die was beaten up and tattered from all the throwing and abuse I gave it. Looking back I would have done two things differently. First, I would have filled the box with newspaper or shipping peanuts to keep the box from caving in. Second, I would have used white duct tape to cover the box instead of butcher paper. Then, instead of painting it, I would use colored paper or poster board. It was a lot of work to make it, but visually it was very cool.
Pros:
- It was fun to watch the die being rolled (tossed in the air).
- The facilitator keeps control. the kids do not choose the color. I like being able to dictate the pace of the game. When the kids are choosing cards or balls it slows things down quite a bit.
- It has that Cool! factor.
Cons:
- Not as easy as the other options to store.
- More difficult to make than the others.
- The kids do not have a chance to pick the first color. While I like to dictate the pace of the game, it is nice when the kids get to participate in choosing a card or ball.
- The die can be hard to manage. It’s not the ideal option if your facilitator is small.
PRIZE WHEEL
After a couple of years of doing this, we picked up a large prize wheel. I knew right away that this was going to be a hit. I had to print and cut out the different colors to place on the wheel which was easy to do.
Pros:
- Visually it is the best option, full of colors. Again, this was a large, freestanding version, not a tabletop one.
- It grabs the attention of everyone because it makes that clicking sound over and over.
- It’s exciting to watch.
- Kids can spin it. However, you have to tell them not to spin it too hard or it will spin for a very long time.
Cons:
- It’s expensive. I think we paid $350-$400. But there are cheaper ones available for lesser quality.
- It takes up some storage space and is not the easiest thing to transport, though it is light.
- It’s more fragile than you’d expect.
The bottom line is that you can’t go wrong with any of these options.
The Ultimate Life-Sized Candy Land Game
I want to end this post with a few pictures and a link to the ultimate Life-Sized Candy Land game that took place in San Francisco for the game’s 60th anniversary. The game board took players down the famous, winding Lombard Street. They used the same mats that we use, only they had a LOT more than we do. They also had people dressed as the characters. This is the Candy Land to aspire to.


This looks amazing!! Thank you for all the ideas and loved your pro and con list.
How were you able to get the pictures of the characters onto the projector?
Brittany, I just hooked up the projector to my laptop and put the character on the screen which projected it onto the wood.
Hello!!
This is all amazing. Did you create the arrows/ sign images for the locations yourself? Would you sell the file if so?
Thank you,
Amy
Amy, we just drew an outline of the signs on the wood and cut them out. We didn’t use any sort of template. However, if you search Pinterest for Candy Land signs I know there are pictures. You can then just do what we did with the characters and project them onto the wood, trace them out and paint them. You might also be able to find something on Etsy. Good luck.
luv it
I’m so grateful for people like you to outline all the pros and cons and options in considering doing such a big project. Thank you for the organization of breaking down the whole project and helping others get a full view of it in its entirety. I appreciate your time spent to help others! I will be tackling this project alone for my kids birthday party and now I can plan accordingly and save me lots of headaches and time spent figuring out all you already have. So glad I searched online to see if anyone else has done this idea. 🙂
I’m so glad you found it useful, Victoria. Thank you for leaving a comment.
Would love to see a pic of your spinning board. Did you include all the options you’d normally get on the cards?
Alice, I don’t have a picture of the spinning wheel we used, but it simply had all the colors on it, except pink. What would normally be on the pink cards were on the tiles. For example, the gingerbread man was taped to one of the colored tiles and if a player landed on that tile, they would get a large candy.
Thank you for the awesome informative article!! On average, how long did it take for a family of 4 to get through the game? We want parents to sign up for time slots….
We had a line of kids (and sometimes parents) go through continuously. Say the color red came up. Each kid on the “board” would go to the red spot in front of them, and the person entering the board would go to the first red. So there may be 6 players or more on different red spaces. Then a new color would be chosen and everyone would move to that color. From when a player started to when they exited the route of colored spaces, it may have taken them a 2-3 minutes or less. It all depends on how quickly you call out the colors and hand out any candy. I hope that answers your question.